Share
Pin
Tweet
Send
Share
Send
For example, a rubber board that you can pull on and get various shapes and whole pictures can be done in 3-4 hours. A child will like such a toy and will be a good tool for the development of fine motor skills, the study of geometric shapes, the concept of size and basic colors.
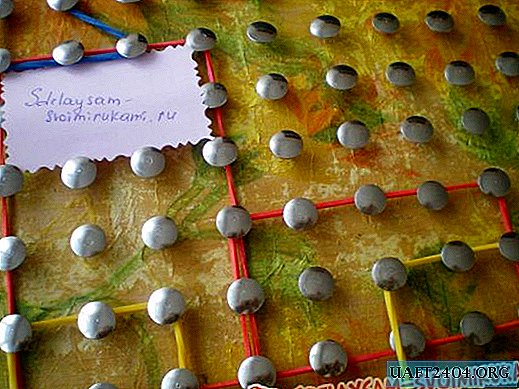
In order to make such a frame, we need:
• Wooden base, here the dimensions are approximately 23x29;
• Buttons (about 200 pieces);
• Rubber bands for money (sold at office supply stores).
For the manufacture of this frame, PVC glue and a two-layer napkin were still needed. The coating on the wooden base was not very - with spots and scratches, so it was necessary to drape it.


At the first stage, we drape the board. Separate the top, with a picture, a napkin layer and put it on top on a wooden base. Pour glue into a small jar and use a brush to apply it on a napkin.

Such actions vaguely resemble decoupage. After the glue has dried and the napkin has stuck to the tree, we do the marking. To do this, you can put dots in the right places with a simple pencil (here they stand every 2 cm, the distance between the rows is also 2 cm).

After that, push the buttons to the intended points. The efforts required to fix the button in the base can be both insignificant and intense. It all depends on the material used as the basis. For example, in some cases the button went all the way to the board. Then it was removed using the clerical knife to the desired height.
In the end, the result is this:

Everything, the frame is ready! You can try to stretch the elastic bands. First, the baby will need your help to figure out the new toy. And then he himself will make different shapes and delight you with his imagination.


Good luck with your creativity!
Share
Pin
Tweet
Send
Share
Send

