Share
Pin
Tweet
Send
Share
Send
To decorate an Easter egg you will need:
- an Easter egg blank carved from wood on a stand;
- light lemon acrylic paint with a pearlescent effect;
- acrylic paint is dark brown;
- brush of medium thickness, 2 pcs.;
- glue "Moment gel transparent";
- Mordan, an adhesive mixture on a varnish basis;
- gold potal, 1 sheet;
- tweezers with sharp ends;
- solvent;
- coarse sea salt, 6-8 tablespoons.
Stage 1. A wooden easter egg blank must be prepared in advance for decoration.
Sea salt glued to the surface of the egg will shine through the tree. Therefore, it is necessary to ground the egg with a color that is consonant with the color of sea salt (if it has a color), or choose any delicate color that will look good through transparent salt crystals.
Cover the egg itself with a layer of light lemon paint, and the base with a layer of dark brown paint. Let the paint dry thoroughly in the air, or if you want to speed up the process, use a hairdryer.
2 stage. Sea salt needs to be soaked for a short time in a plate with warm water. Then, with a tablespoon, select all the salt and arrange to dry on a plastic bag on the table. Soaking is necessary so that the salt acquires a bright shine and transparency. Stir the salt periodically during drying.
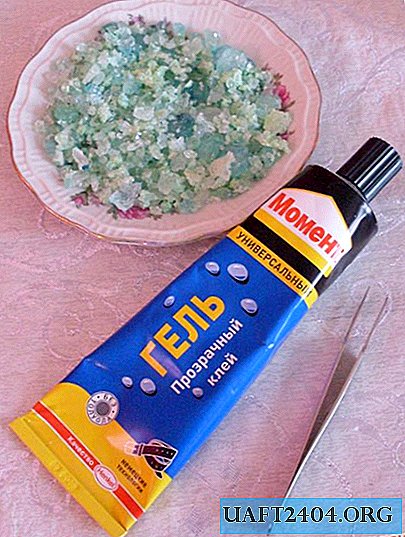
3 stage. The prepared salt must be glued to the Easter egg. For convenience, you can use tweezers with sharp ends. First glue large crystals of salt, on top of them - medium and small. Give the glue time to dry well.

4th stage. Primed with brown acrylic Easter egg stand cover with a thin layer of mordan. Clean the brush with solvent. Mordan dries for a long time. To understand whether it is already necessary to glue the potal or not, swipe a finger edge along the surface covered with mordan. If you hear a creaking sound, then it's time to glue the potal. If the finger sticks, it's too early.

5 stage. When the mordan has dried up enough, take a potal, and, laying in small pieces on the easter egg stand, with a dry brush, fix it on the surface with a dry brush. She will stick to the face. Since the surface of the stand is curved, in some places the potal will be bad and uneven. Where the potal has not stuck, there will remain dark places (a surface covered with brown acrylic) imitating aged gold.

Easter egg is ready!

Share
Pin
Tweet
Send
Share
Send

