Share
Pin
Tweet
Send
Share
Send
So let's get started!
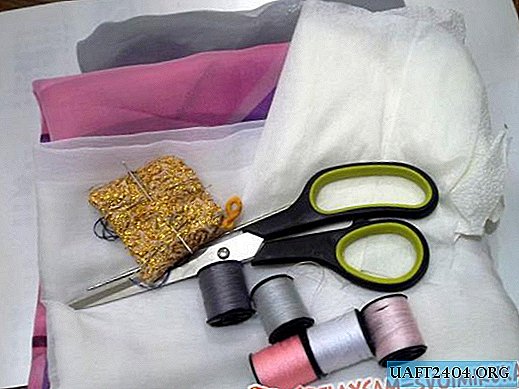
We will need:
-30 cm chiffon fabric of each color (pink, white and gray),
sewing threads (white, gray pink, shades of gray and pink),
-paper towels,
- silver lurex threads,
- sewing machine,
- needle bar
-scissors,
-Crochet hook,
pins
Portnovsky crayons.
Working process
1. Unwind a paper towel along the length of the desired scarf. If there is not enough width, then unwind the same length and fasten the edges with needles. This is the basis. You can use non-woven fabric if you do not want paper towels, but non-woven fabric is several times more expensive and it dissolves in water worse, moreover, it is more difficult to find, because you need a special water-soluble non-woven fabric. Namely, because of its good solubility in water and budget, I chose it and I advise you.

2. On chiffon, we draw droplets in the form of a peacock feather 8-10 cm long, these pieces are cut out. About 30 - 25 pieces should come out of 30 cm of each color. In total, somewhere around 90 drops should work.

3. We pin the droplets with needles over the entire area of the desired scarf, or thread them onto the base. I was planning on towels. This is to whom it is convenient. I must say that the droplets need to be distributed evenly over the entire surface and make sure that there is not a lot of one color nearby or that there are no droplets that are somewhere tight, and somewhere else liquid.

4. On the sewing machine, we sew the stitches from one droplet to another throughout the scarf, first in one color - pink. This work is long, but the result is worth it. By machine line, be sure to go into the droplet, as shown in the Photo, otherwise the entire product will fall apart into pieces after washing, because the droplets will not be sewn together, then in other colors - gray, pink and white.


So across the entire scarf.
5. You can sew the "veins" of the droplets with lurex, or you can simply over the area of the scarf.

6. Soak the whole thing in warm water without powder and gently wash to dissolve the paper. Remove the paper from the scarf.

7. Then dry and iron.

8. We look - there is no paper, only the "cobweb" remains.
9. In order to make the scarf look neat, we will crochet the edges, but you can just hem them neatly. I tied the edge of the scarf with threads, which I used to sew the space between the droplets. I connected several colors in one thread and tied the usual air loops around the edge first. capturing the edges of the scarf. Thus it turned out just a neat edge. Next, I crocheted a scarf for the beauty with columns with a crochet. It turned out great!

As a result, such a scarf is obtained.

Further options for wearing and demonstration of the product itself.

I want to say that from my environment people did not understand how I made this scarf. I had to explain to everyone. Many immediately wanted the same, but different color.


Creative success!
The author - Bodrova Elizaveta Sergeevna.
Share
Pin
Tweet
Send
Share
Send

