Share
Pin
Tweet
Send
Share
Send
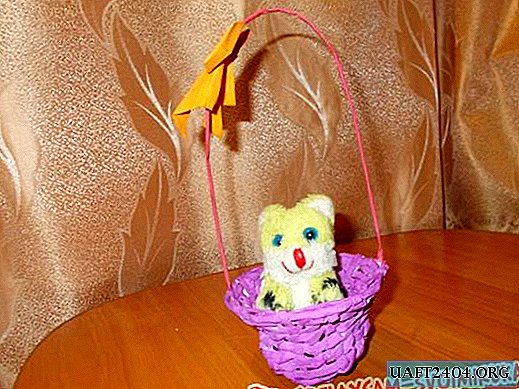
It would be more convenient to work, of course, with thin paper - for example, newspaper - but if it is not there, then you can make a basket out of the hands, most importantly - finely wrap it.
For work, we need:
1. Notebook (preferably in a line), from 12-18 sheets;
2. Glue, scissors;
3. A core for twisting paper (you can take a knitting needle), we have a core from under the handle;
4. Paints (any, of your choice), brush, glass for drawing.

First, we pull out two sheets from the center of the notebook and divide them into equal parts, folding several times across:


We turn the resulting pieces of paper using the rod from under the handle into a tube, twisting it as shown in the photo. So you can wrap the paper as thin as possible:

Glue the tube in the right places:


The tube should turn out like this:

We make it flat by pressing on top and bottom:

Now add up and down five such tubes:

We take two tubes and connect them to each other, gluing their ends to each other. We start weaving from the middle of the resulting tube: one half of it should braid the center (the bottom of the basket) from the right and left sides, and the other from above and below.
This should be the very first round of weaving:

We braid the bottom in the second round:

Starting from the third circle, all other weaving circles extend to the top from the bottom. Now each tube should be braided individually, and we should try to bring the side tubes of each of the four sides closer to each other, leaving a suitable distance between them:


Thus we braid around the future basket in a circle, determining and choosing the appropriate size for it. (For example, I decided to expand it upwards, and for this I began to bend the tubes down).
After weaving, we cut the tubes sticking out in a circle and bend them in turn into the inner and outer sides:

Having bent all the ends, we fix them with glue, after which we attach a pen, picking up thin paper for it; in the resulting upper loops of the basket we introduce two tubes of newspaper or other thin paper, and we pass it through all the loops, gluing them together at the end:

Now the basket needs to be painted. I took gouache paints for this, but you can use watercolor, if there are none. You can also choose a shade of any, to your taste:

Let's make a basket with a decorative origami bow. To do this, we need a small square piece of paper:

We bend it in four directions:

We add here such a figure, folding the sides:

We bend the upper side on it (the lower part should open):

We return our figure to its original position:

We bend down the side ends on it:

We push the upper square inside and bend to the center one of its former sides, the middle one:

With the second side we do the same:

We should get this figure:

We turn it like this:

Bend its two upper side edges downward like this:

Turn the figure over and bend the edges on the same side:

Open the figure, holding the front and rear ends:

It should be like this:

Turn the figure over:

We cut the figure along the fold indicated by the scissors to the middle. Four such sides need to be cut:

Fold down and press one of the sides:

We bend the upper edges as shown in the photo:

Turn the bottom square up and press:

We bend the lower edges as shown in the photo:

Turn over. You should get this figure:

We wrap two lateral ends in the center, forming a bow:

We turn and bend the figure in the places shown in the photo:

Cut the bottom of the bow in half and fold it like this:

Turn the figure over:

Origami bow ready for the basket. It can be painted in any color that is suitable. Glue it to our basket:

Our homemade basket is ready! You can put sweets or cookies in it, or some kind of toy as a gift.


Share
Pin
Tweet
Send
Share
Send

