Share
Pin
Tweet
Send
Share
Send
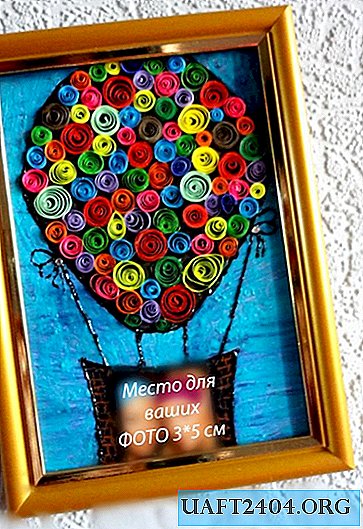
If you want to easily put photos into a photo album, and decorate the walls beautifully with them, the “Pleasant Moments” workshop is for you. It’s not difficult to make masterpieces, and in your arsenal it is enough to have paints and colored paper. So, let's get started?
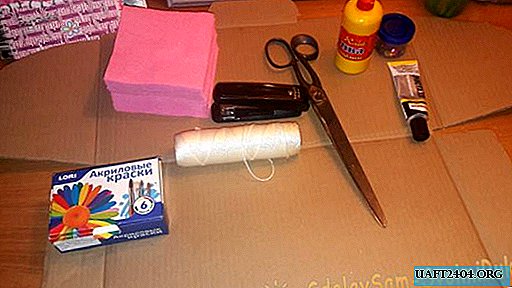
Materials for the master class:
- colored paper;
- paints of white, blue, brown and black colors;
- scissors, glue, ruler.
1. We take a sheet of cardboard, primed it with white paint.

2. We draw a sketch of the future drawing with a simple pencil.

3. From double-sided colored paper of different colors, we cut strips 1.5-2 mm wide and 15 to 20 cm long.

4. Using a split toothpick or quilling tool, we begin to rewind paper rolls.

5. Twist the length of the entire paper into a roll.

6. Put the twisted roll on a flat surface and give the opportunity to slightly unroll. Fix the edge with glue.
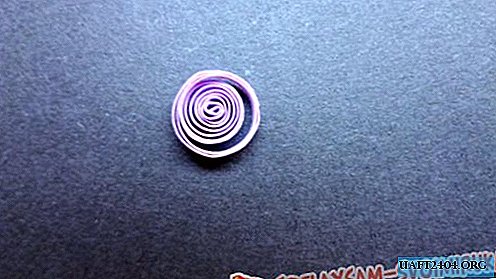
7. We make many such rolls of different colors.

8. Using a compass, measure the diameter of the balloon.
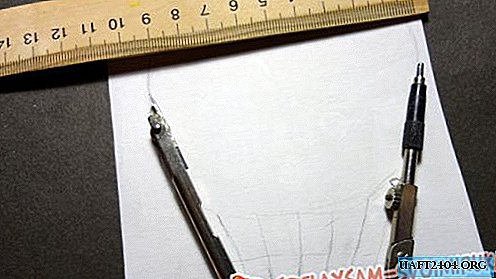
9. Circle it on a sheet of black paper, cut it out and glue it to the drawing.

10. Punish with PVA glue the side of the roll.

11. We begin to stick rolls of different colors and sizes on the balloon, close to each other.

12. Thus, gradually fill the entire ball.

13. We paint the basket with black paint.

14. Paint the blue color over the entire surface, creating a background for the picture.
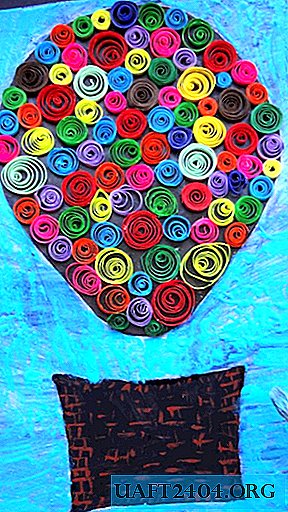
15. Brown paint draw the "bricks" on the basket.

16. Using a contour or black paint, circle the basket and the balloon.

17. We draw the cables.

18. We draw rope bows. If desired, glue a strassink in the middle.

19. Our picture frame is ready. Now it remains to find a photo of a suitable size and place it in the basket. We wish you success!


Share
Pin
Tweet
Send
Share
Send