Share
Pin
Tweet
Send
Share
Send
Materials and tools
For manufacturing, you will need:
Instruments:
- Drill.
- Bulgarian.
- Hand tools.
- Welding machine. etc.
Materials:
- Engine.
- Metal strip.
- Board (base).
- Housing (for electronics).
- Fasteners (bolts, nuts, etc.).
DIY sharpening

And so let's go. First, we’ll take measurements of the engine for future mounting.

Then, using a vice and a hammer, we make such a bracket from a metal strip.

At the ends of future fasteners we drill two holes.

On the plank itself, we drill two holes for the bracket itself.

A piece of fiberboard will serve as a gasket under the engine, to dampen vibration.

Install the engine.

We fix with the help of a bracket, and tighten it all with bolts, under the caps of nuts and bolts we adjust the washers.


As a case, I will serve as a box. In which we make two slots for the wires.

Using the standard mount, we fix the capacitor on the case itself.

Set the switch.

We connect the electronics, the main thing here is not to make a mistake when connecting, it is best to have a multimeter or a circuit with you (the Internet is full).

Initially, I wanted to set the speed regulator, but since the engine was slightly revving, I connected the standard electronics.

In the case we make four holes for the screws.


And twist at a slight angle.

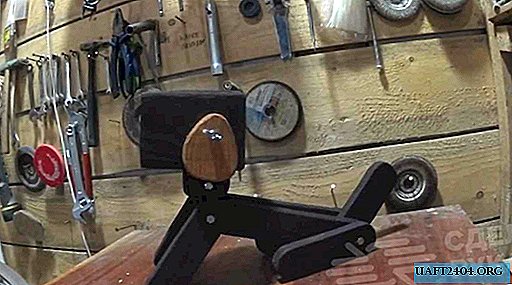
To fix the abrasive, we need two important details, these are two washers from an old grinder.

We install one of the washers as in the photo, here accuracy plays an important role.

Using welding we grab the washer and the mount is almost done.

Next, grind the puck on both sides as in the photo, so that it fits well in the grooves of the second puck.


Install the abrasive.

Then the second washer.

A little washer.

Counter washer.

And tighten the nut by 13.

From the same washing machine there was a body from the engine, from which I will make a protective cover against dust and dirt.

Cut off.

Try on.

And install.

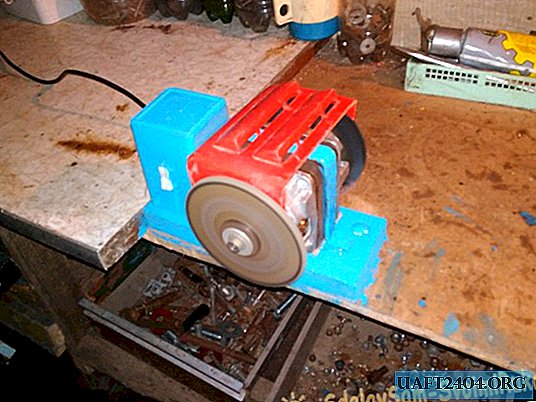
Sharpened, I will fasten to the table with two bolts.

Before painting, we clean the surface.

And paint.

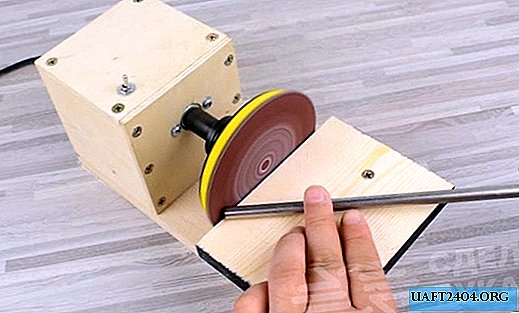
Work result
Sharpened ready.

As a result, we get such a grindstone, there are a lot of applications, polishing wheels, emery wheels, etc.

Share
Pin
Tweet
Send
Share
Send