Share
Pin
Tweet
Send
Share
Send
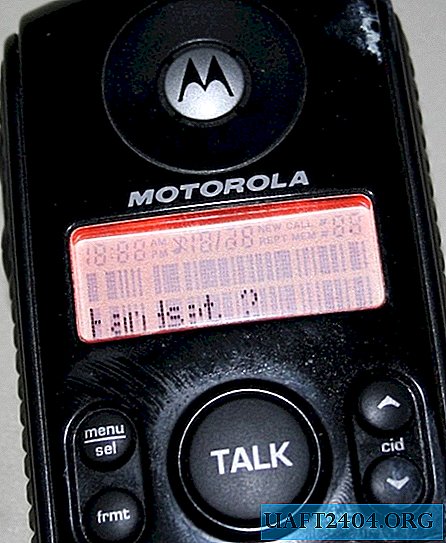
This instruction manual will show you how to repair a liquid crystal display with dead rows or columns. An old phone is taken as an example, but the principle is also suitable for other devices.
Typically, the display is connected to the controller via a flexible cable, and it, in turn, is held by glue on the board. So, the glue may dry up over time. As a result, some compounds may lose contact.
Necessary tools
To restore the screen you will need:
- A set of screwdrivers for disassembling the phone.
- Plain eraser on a pencil.
- Heat gun.

Disassembling the phone and preparing the screen

The phone must be disassembled. Depending on the model, different screwdrivers will be required, for example, I only needed one small Phillips screwdriver.


The screen of this phone model is fixed with a plastic clip, which is carefully removed. Then the screen is unbent and a ribbon cable with contacts is exposed. So that the screen does not interfere during operation, I fixed it with a plastic clip.


Reconnect
Now the most crucial step is restoring the controller to the display. With the help of hot air, the cable is neatly warmed up, namely its fit to the board. During warming up, the connection must be pressed evenly. For this, a pencil with a wipe at the end is used, it is convenient for them to smooth the surface.

A few tips:
- It is not worth it to heat up the LCD display itself, as this can permanently disable it.
- You need to warm up the contacts gradually and not very much: it is enough to melt the glue and dirt on the tape connector.
- If smoothing with an eraser fails, use something harder. For example, the plastic handle of a small screwdriver.


Result
After recovery, the screen became fully operational, with no gaps or dead spots. The whole process of disassembling / assembling the phone took only 10 minutes.

Original article in English
Share
Pin
Tweet
Send
Share
Send