Share
Pin
Tweet
Send
Share
Send
But the experience of craftsmen shows that, even without knowing the turning business, you can make a mechanical cleaver from improvised materials, adapting it to the place, volume of work and anthropometric data.
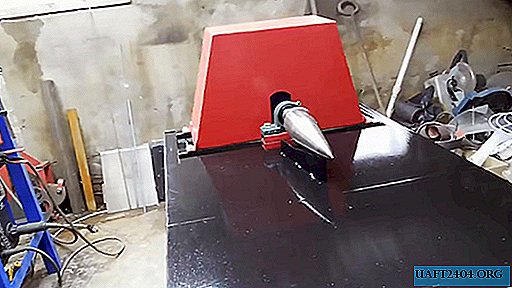
Will need
In principle, almost all materials and assemblies for assembling a mechanical cleaver can be removed from old cars, household appliances and found in landfills. But it doesn’t hurt to know how much this or that “thing” is in the store, how much the engine will cost from the old washer, what the turner will ask for work, etc.
So, what should we stock up if we decided to make a mechanical cleaver:
- round rolled steel (round timber);
- masking tape;
- sheet metal of different thicknesses;
- profile pipe about 14 m;
- flywheel from the GAZ-53;
- bolts, nuts, washers;
- an engine with a pulley and belt;
- paint and brush;
- conical screw cleaver carrot.
From tools and equipment we must have at hand:
- grinder with disks;
- plasmoresis;
- file for metal;
- welding equipment;
- vice and clamps;
- drill with drills.
Production of knots and details of a splitter
We fix the round timber in a vice and mark the places of cuts with masking tape for speed and ease of ensuring the desired accuracy.

According to the markings, we cut the blank of the wood splitter shaft using a grinder and a 180 mm cutting disc.
We mark the surface of a thick sheet of metal with two disks of different sizes, but with the same central holes.
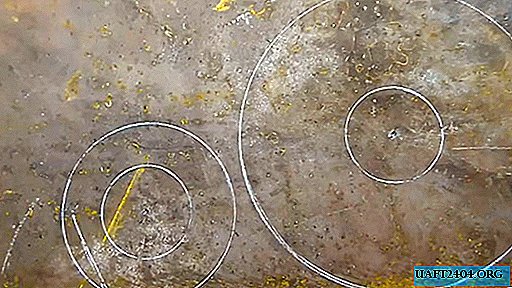
It is more convenient and accurate to cut them with a plasma cutter, as a result, the amount of subsequent processing is minimized.
We bring the discs to the desired size with a file and a grinder, and in order not to remove the excess metal, we paste on the side surfaces the exact patterns of tape or paper.

The main attention in the processing of discs is given to the central holes: the shaft blank must freely enter them, but the gaps should be minimal.
This operation is one of the crucial ones: we weld a large disk exactly under 90 degrees to the round timber. Therefore, we conduct welding carefully, constantly checking the angle between the parts so that they do not lead, and we use magnetic squares. We clean welds.
The second ring is easier to install. It is enough to press it tightly and fix it to the first disk with clamps and weld in this position.


Now, a turner will work on the workpiece: it will grind the front support, which is welded to the smaller ring, grind circular surfaces to size and make a series of ring grooves under the drive belt.
From the profile pipe, we cut the workpieces of the required size and in the required quantity, from which we weld not just a desktop, but the base for installing also mounted units.


Separately, we weld a subframe to the main frame under the countertop, to which the electric motor will be attached and adjusted.

We cut out the grinder two symmetrical parts from a metal plate 6 mm thick, which, welded together and fixed on the countertop, will be a kind of blade-stop on a wood splitter.

Since the load on our device will constantly change, you can not do without a flywheel. In our case, the GAZ-53 flywheel with an outer diameter of 372 mm, a landing hole of 40 mm and a mass of almost 16 kg turned out to be the most suitable in size and weight.

We remove the ring gear from this part and clean it of long-term oily dirt using a hammer, a screwdriver tip and a grinder with nozzles.

We perform static balancing of the shaft and the flywheel by screwing them to each other with bolts and nuts. Due to the lack of a balancing machine, we invent it using only available cash.


To do this, temporarily place two corners on the table frame in parallel and gently grab them. Using the level, we provide the maximum possible flatness to the corners and put a shaft with a flywheel on them.

Give the rotation to the flywheel and monitor the moment of stop. If there is an unbalanced mass on it, then before stopping it will roll back a little. Moreover, the excess mass will be at the lowest point. We mark this place and drill a hole, removing, thereby, the excess mass.

Balancing will be considered complete when the shaft and flywheel do not roll back before stopping.
For safety, from the remains of the profile pipe and sheet metal, we make a protective cover on the flywheel and cook the tabletop.


We connect two symmetrical parts with each other at an angle, inside we have a spacer and weld the resulting assembly to the countertop.

All nodes and parts are made, so proceed to painting them with an ordinary brush.
Estimated Costs
Let’s estimate what a homemade splitter will cost us:
- flywheel - 1200 rubles .;
- profile pipe 14 m - 1200 rubles .;
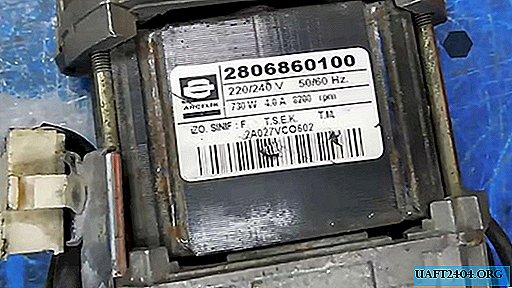
- the engine from the washer (730 W, 8 thousand rpm) - 530 rubles;
- "carrot" (base diameter - 70 mm, height - 250 mm) - 1300 rubles .;
- two 206 bearings in the housing - 600 rubles;
- the work of the turner - 1650 rubles .;
- hardware and drive belt - 530 rubles.
In total, it turns out about 7 thousand rubles. This is 3 times less than the cheapest factory splitter.

Assembly of knots and details of the splitter
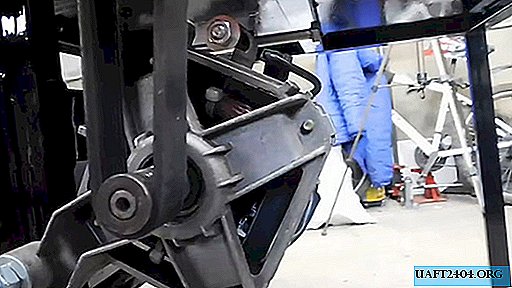
Fasten the flywheel firmly to the shaft, put on the belt, bearing units and fix the unit to the frame.
We install and fasten the “carrot” on the shaft end with two special pins.


We tighten the belt by twisting the bolt intended for this purpose, which abuts the support, pushes the engine and pulls the belt.

The electrician consists of a power cord, a switch and a voltage regulator from the grinder. The connection system is quite standard.


At startup, the presence of a regulator eliminates jerking and provides a smooth set of revolutions by the flywheel. This is very important, because the belt does not slip in the grooves, which means it will last longer.
Also, thanks to the voltage regulator, you can change the power, which without load immediately leads to an increase in speed.
We install a protective cover on the flywheel in order to protect ourselves and nearby people from injuries if the flywheel suddenly flies off the shaft or crack.

Test of a wood splitter in business
First, try to split a small piece of the board. With her, our homemade copes effortlessly. The same thing happens with dry logs, which were stored under a canopy. Completely without stress, the wood splitter straightens out a rather massive hemp.

If suddenly the “carrot” gets stuck in the log, then turning off the power, using the key, rotating the shaft behind the back, without any problems we release the working tool from the log in which it is stuck.

Even this little practice has shown that the carrot mount on the shaft should be recessed so as not to interfere with chopping wood, and the table should be on a completely horizontal surface. This will negate even small vibrations during the operation of the splitter.
It is also impossible to work on this unit with gloves and mittens, and the sleeves of the clothes should not be too long and without laces, belts and other hanging elements so that they do not twist on the "carrot" and do not hurt the hands.

Share
Pin
Tweet
Send
Share
Send


